
You made a button that works when you click it. Can someone reach it with Tab, see where they are, and activate it without a mouse? That small test can change how you build every interaction after it.
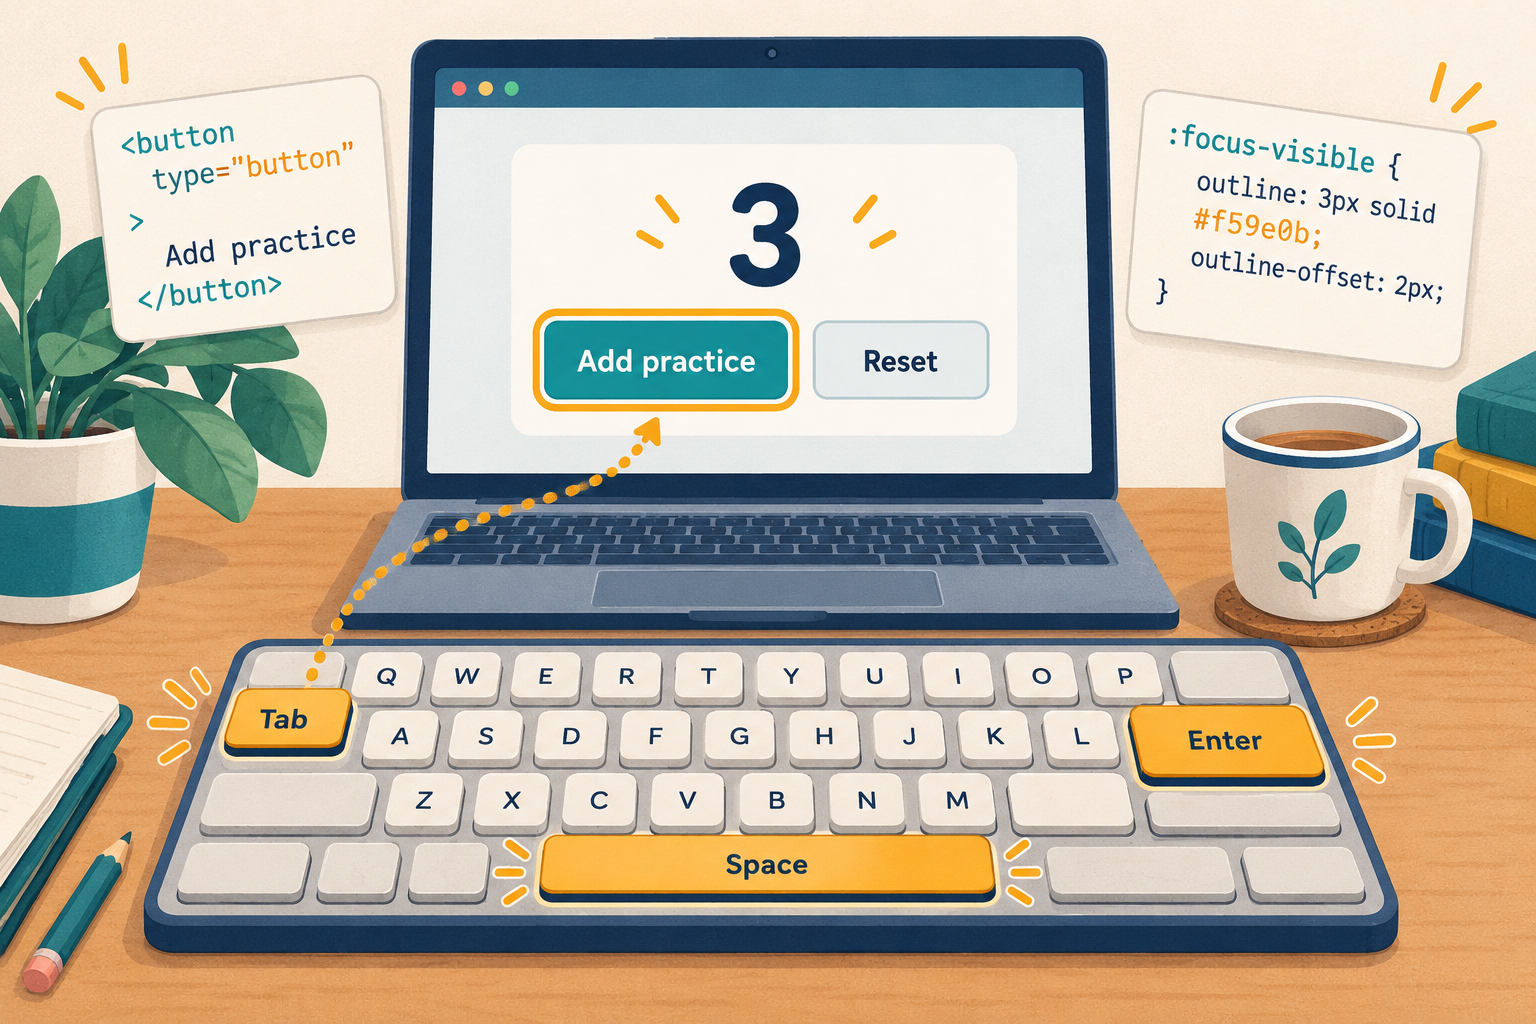
In this project, you will build a tiny counter for completed coding exercises. You will practise three habits: choose the right HTML element, keep keyboard focus visible, and announce a result when the page changes.
Before you start: You should recognise an HTML button, a CSS rule, and a JavaScript click event. If these are new, try Create an Interactive Button with JavaScript first.
1. Start with a real button
A clickable box can look like a button without behaving like one. Use <button type="button">Add practice</button> for an action. A native button already supports keyboard interaction; you do not need to recreate it with a clickable div.
Use a link when someone should go to another page or section. Use a button when they should do something on the current page. Clear text such as “Add practice” also explains the action better than an unexplained icon.
2. Build the complete example
Save the following as practice-counter.html and open it in your browser. It is one complete file: the HTML, CSS, and JavaScript stay together so you can focus on the behaviour.
<!doctype html>
<html lang="en">
<head>
<meta charset="utf-8">
<meta name="viewport" content="width=device-width, initial-scale=1">
<title>My practice counter</title>
<style>
* { box-sizing: border-box; }
body { margin: 0; padding: 24px; font-family: system-ui, sans-serif; line-height: 1.6; color: #172b3a; background: #f4f7fa; }
main { max-width: 640px; margin: auto; padding: 24px; background: white; border: 1px solid #657787; border-radius: 12px; }
.actions { display: flex; flex-wrap: wrap; gap: 16px; }
button { font: inherit; padding: 12px 20px; border: 2px solid #145da0; border-radius: 6px; color: white; background: #145da0; cursor: pointer; }
button:focus-visible { outline: 3px solid #172b3a; outline-offset: 4px; }
#count { font-size: 3rem; font-weight: bold; margin: 12px 0; }
</style>
</head>
<body>
<main>
<h1>My practice counter</h1>
<p>Count the small coding exercises you finish in this session.</p>
<p>Exercises completed: <span id="count">0</span></p>
<div class="actions">
<button type="button" id="add">Add practice</button>
<button type="button" id="reset">Reset</button>
</div>
<p id="status" aria-live="polite" aria-atomic="true"></p>
<p>This counter resets when you reload the page.</p>
</main>
<script>
let completed = 0;
const count = document.querySelector('#count');
const status = document.querySelector('#status');
document.querySelector('#add').addEventListener('click', () => {
  completed += 1;
  count.textContent = completed;
  status.textContent = `${completed} ${completed === 1 ? 'exercise' : 'exercises'} completed.`;
});
document.querySelector('#reset').addEventListener('click', () => {
  completed = 0;
  count.textContent = completed;
  status.textContent = 'Counter reset. Start a new practice session.';
});
</script>
</body>
</html>
3. Understand the three accessibility choices
Native controls: Both actions use buttons with type="button". The explicit type prevents accidental form submission if you later place them inside a form. The click listener also responds when the browser activates the button through the keyboard.
Visible focus: The :focus-visible rule draws a dark outline around the active button when the browser determines a focus indicator is needed. Its offset separates the outline from the button border. Do not remove the browser’s outline without providing a clearly visible replacement.
Announced feedback: The empty status paragraph is present before any interaction. Its aria-live="polite" attribute lets assistive technology announce later updates without deliberately interrupting the current speech. aria-atomic="true" requests the whole message. The visible number changes too, while keyboard focus stays on the button.
JavaScript updates the number and feedback with textContent. The variable completed holds the count; changing the variable alone would not update the page. This version keeps no saved progress, so a reload starts at zero.
4. Test it with your mouse set aside
- Open the page and press Tab until “Add practice” receives focus. Browser settings may affect which controls Tab reaches.
- Check that you can clearly see the outline.
- Press Enter once. The count should become 1 and the feedback should say “1 exercise completed.”
- Press Space once. The count should become 2. A focused native button normally activates when Space is released.
- Press Tab to reach “Reset”, then activate it. The number should return to 0.
- Press Shift+Tab to move back. The order should follow the buttons as they appear on the page.
If you use a screen reader, repeat the test and listen for the feedback after each action. Announcements can vary by browser and screen reader combination. A successful keyboard test is one useful check; it does not establish that the entire website is accessible.
5. Avoid these beginner traps
- The button only works with a mouse: replace a clickable div with a native button before adding custom keyboard code.
- You cannot see your position: look for an
outline: nonerule and restore a visible focus indicator. - The counter never changes: check that your HTML IDs match the JavaScript selectors and that the script runs after the buttons exist.
- Tab jumps around: keep a sensible HTML order. Avoid positive
tabindexvalues that force a separate navigation order.
6. Make one useful change yourself
Replace “Add practice” with “Finish an exercise”. Predict whether changing the button text will break the script, then try it.
Answer: It still works because the script finds the button by its ID, add, rather than its visible text. The clearer label changes what the learner reads, while the ID keeps the connection intact.
Next, write one sentence explaining each of these: the button, the focus outline, and the live status message. If you can explain their jobs without looking at the code, you are learning more than how to copy an example.
Bring this habit to your own website
Choose one interaction on your hobby page. Reach it with Tab, activate it with the keyboard, and check its feedback. Fix one obstacle and test again. Small improvements are easier to understand when you make and verify them one at a time.
Continue with the Playcode123 learning path. If a change stops working, use the beginner debugging guide to investigate it.